
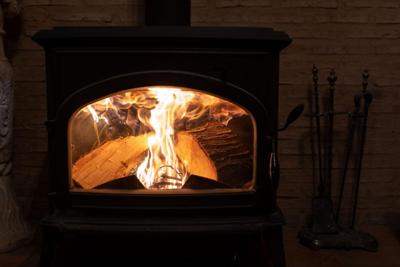

A wood-burning stove is an excellent way to heat a home, providing warmth, ambiance, and an efficient heating solution. However, many people struggle with getting the fire started properly, leading to excessive smoke, poor heat output, or difficulty maintaining the fire burns.
Lighting a stove correctly is not just about convenience—it’s essential for maximum efficiency and safety. Using the right method, firewood, and air supply ensures that the fire burns cleanly, reducing soot buildup in the chimney and improving heat output.
This guide will take you through the best way to light a wood-burning stove, focusing on the top-down method, which allows the fire to burn hot and efficiently. We’ll also cover essential tips on selecting the right fuel, managing airflow, and keeping your stove in peak condition.
Understanding the Materials Used in Wood-Burning Stoves
The efficiency and durability of a wood-burning stove depend on the materials used in its construction. Refractory materials play a crucial role in retaining heat, improving combustion, and protecting the stove from high temperatures.
Common Refractory Materials in Wood-Burning Stoves
- Fire Bricks – Made of refractory ceramic, these bricks line the interior of the burning stove to absorb and retain heat, ensuring the fire burns at an optimal temperature.
- Cast Iron – A highly durable material that distributes heat evenly and provides excellent thermal retention, helping the room stay warm even after the fire dies down.
- Steel – Some wood burners use steel, which heats up quickly but does not retain heat as long as cast iron.
- Vermiculite Panels – Lightweight, heat-resistant panels used in some modern wood stoves to reflect heat back into the fire for maximum efficiency.
- Ceramic Glass – The stove door often features high-temperature ceramic glass, allowing you to monitor the fire while withstanding extreme heat.
Using the right materials enhances the performance and longevity of your wood burner, ensuring better heat retention and improved efficiency. You can find most of these materials at Vitcas Shop.
Preparing Your Wood-Burning Stove for Lighting
Before you start, preparing your wood-burning stove correctly is crucial for an efficient and safe fire. Poor preparation can lead to slow ignition, excessive smoke, or difficulty keeping the fire burns going.
Clean Out the Stove and Grate
A well-maintained wood stove operates at maximum efficiency. Before lighting, check the grate and remove excess ash from previous burns. While a small amount of ash can help insulate the fire, too much can restrict the air supply, making it difficult to burn hot.
Check the Chimney and Flue
A blocked chimney or flue can cause poor airflow, leading to inefficient combustion and increased smoke in the room. Regularly inspect the flue for obstructions and follow regular maintenance schedules to prevent buildup. Ensuring an open flue is essential for proper airflow when lighting the stove.
Inspect the Air Controls
Your wood burner has air controls that regulate the amount of oxygen feeding the fire. Ensure these are fully open before lighting to give the fire the best chance to ignite properly. Adjusting the air supply as the fire develops helps control the heat and burn rate.
Ensure Proper Ventilation
Before lighting the stove, open a nearby window slightly to allow fresh air to enter the room. This helps with airflow and prevents a vacuum effect that could draw smoke into the house rather than up the chimney.
By following these preparation steps, you set up your wood-burning stove for a successful and hot fire burns.
Choosing the Right Firewood
The quality of firewood you use significantly impacts how well your wood-burning stove performs. The wrong wood can produce excess smoke, burn inefficiently, or struggle to ignite.
Use Firewood with Low Moisture Content
For the best burn, always use firewood with a low moisture content—preferably below 20%. High moisture content wood produces more smoke and less heat, making the fire inefficient. Using a moisture meter can help you determine if your logs are dry enough for burning.
Select the Right Wood Type
- Hardwoods (oak, ash, beech) burn longer and hotter, making them ideal for sustained heat output.
- Softwoods (pine, spruce) ignite faster but burn quickly, making them useful for kindling.
Using a combination of both can help get the fire started quickly while maintaining a hot burn over time.
Small Logs vs. Larger Logs
When lighting the stove, start with small logs and kindling, as they catch fire more easily. Once the fire is established and burning, add larger logs gradually to sustain the heat.
Using Kindling and Fire Starters
Kindling consists of small pieces of dry wood that help the fire ignite quickly. Pair it with a fire starter such as:
- Dry paper or cardboard
- Wax-based firelighters
- Small dry twigs
Avoid using wet wood, treated wood, or household waste, as these can produce harmful chemicals and excessive smoke.
By selecting the right fuel and ensuring it has a low moisture content, you’ll set the stage for an efficient, hot fire that burns with more heat and less smoke.
The Top-Down Method: Best Way to Light a Wood-Burning Stove
Using the top-down method is one of the most effective ways to light a wood-burning stove. This technique ensures cleaner combustion, more heat, and reduced smoke production. Unlike traditional methods that start with kindling at the bottom, the top-down method works by placing larger logs at the base and igniting the kindling stack on top.
Step 1: Arrange the Firewood in Layers
Proper stacking of logs inside the stove is crucial for efficient burning. Follow these steps:
- Place two logs at the bottom of the wood burner, leaving enough space between them for airflow.
- On top of these larger logs, stack small logs in a crisscross fashion. This structure allows the fire to spread evenly as it moves downward.
- Create a kindling stack on top of the small logs, using small pieces of dry wood.
- Place a small amount of fire starters, such as dry paper or wax-based cubes, among the kindling to help it ignite quickly.
- Open the air controls fully to allow enough oxygen to feed the flames.
- Keep the stove door slightly open in the first few minutes to prevent smoke buildup and allow the fire to establish.
- Light the kindling stack at the top and let the flames work their way downward.
- As the fire burns, the small logs below will gradually catch fire, igniting the larger logs at the base.
- Avoid adding more wood too soon, as this can smother the fire and reduce heat output.
Step 2: Add Kindling and Fire Starters
Step 3: Control Airflow for Maximum Efficiency
Step 4: Ignite the Fire and Allow it to Burn Hot
By using the top-down method, you create a longer-lasting fire, reduce smoke, and ensure that the wood burner operates at maximum efficiency.
Managing the Fire for Long-Lasting Heat
Once the fire started, managing it properly ensures consistent heat and an efficient burn. Poor fire management can lead to wasted fuel, excessive smoke, and difficulty maintaining the fire burns.
Adjust the Air Supply Gradually
- At the beginning, keep the air controls fully open to allow enough oxygen for the fire to establish.
- Once the fire is burning hot, reduce the air supply gradually to maintain steady combustion.
- Closing the air supply too soon can cause smoke and incomplete burning, reducing efficiency.
- Wait until the initial logs have burned down to embers before adding more wood.
- Place new logs carefully, ensuring they have enough space to allow air to circulate.
- Avoid overloading the stove, as too much wood at once can choke the fire and produce excessive smoke.
- Keep the stove door completely closed once the fire is stable to prevent heat loss.
- Only open the door when adding logs, and do so slowly to prevent sudden airflow changes that could cause smoke to escape into the room.
- An ideal flue temperature ensures that the fire is burning hot enough for efficient combustion.
- If the flue is too cool, creosote buildup can occur, increasing the risk of chimney fires.
- Always use low moisture content firewood to reduce smoke production.
- Do not close the air controls too soon, as this can starve the fire of oxygen and cause smouldering.
Adding More Wood at the Right Time
Keeping the Stove Door Properly Adjusted
Monitor the Flue Temperature
Avoiding Excess Smoke
By properly managing your wood-burning stove, you’ll enjoy a longer-lasting, hot, and efficient fire with minimal smoke.
Lighting a wood-burning stove correctly is essential for achieving maximum efficiency, minimizing smoke, and ensuring a warm and comfortable room. By preparing the stove properly, choosing the right wood with low moisture content, and using the top-down method, you can create a fire that burns hot and lasts longer.
Managing air supply, adding more wood at the right time, and following manufacturer instructions will help maintain an even heat output. Regular maintenance, such as cleaning the chimney, adjusting airflow, and using high-quality materials, further enhances performance and safety.
With these practical steps, your wood-burning stove will provide reliable and efficient heat, creating a cosy and inviting home atmosphere.
(0) comments
Welcome to the discussion.
Log In
Keep it Clean. Please avoid obscene, vulgar, lewd, racist or sexually-oriented language.
PLEASE TURN OFF YOUR CAPS LOCK.
Don't Threaten. Threats of harming another person will not be tolerated.
Be Truthful. Don't knowingly lie about anyone or anything.
Be Nice. No racism, sexism or any sort of -ism that is degrading to another person.
Be Proactive. Use the 'Report' link on each comment to let us know of abusive posts.
Share with Us. We'd love to hear eyewitness accounts, the history behind an article.