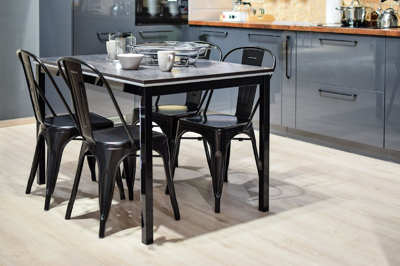
Giving your furniture a fresh look doesn’t have to mean replacing it entirely. Installing metal legs is one of the simplest and most effective ways to breathe new life into your old tables. Metal table legs offer a modern, industrial aesthetic and provide durability and stability, making them a popular choice among DIY enthusiasts and interior design lovers. If you’re ready to elevate your furniture, this guide will walk you through installing metal table legs step by step. By the end, you’ll see how easy it is to transform your space creatively.
Why Choose Metal Table Legs?
Metal table legs have become a popular upgrade option because of their sleek design and long-lasting quality. They pair beautifully with various tabletop materials, such as wood, glass, or marble, creating an elegant contrast that instantly enhances any room. Additionally, metal legs are resistant to wear and tear, making them an excellent investment for furniture that sees heavy daily use. Beyond aesthetics and durability, metal table legs are available in various designs, from minimalist straight legs to ornate, vintage-inspired styles. This versatility lets you easily customize your furniture to match your taste and home decor.
Preparing the Tabletop
Start by flipping your tabletop upside down to access its underside easily. If you’re working with an older table, clean and inspect the surface. Remove any old hardware or leftover adhesives to ensure a smooth installation. Once the surface is prepared, use the measuring tape to mark where the legs will be attached. Proper placement is crucial for maintaining stability and balance. Generally, metal legs are positioned about an inch or two from the table's edge. Use the pencil to mark the spots where the screws will go.
Attaching the Metal Legs
With your markings, it’s time to secure the metal legs. Align each leg with the marks you made earlier. Hold them firmly in position and drill the screws through the pre-drilled holes in the leg’s mounting plate. Ensure the screws are tight, but be cautious not to overtighten, as this can damage the tabletop material. Check each leg with a level to confirm that it is straight and even. Small adjustments can make a big difference in the table’s stability, so take your time during this step.
Final Touches and Maintenance
After all the legs are attached, flip the table back over carefully. Inspect it for wobbling or unevenness. If necessary, make small adjustments by tightening the screws or using furniture pads on the feet of the metal legs. To maintain your newly upgraded table, clean the metal legs regularly with a soft cloth and avoid using abrasive cleaners that could scratch the finish. With minimal care, your table will remain a stunning centerpiece in your home for years.
Installing table legs metal is a straightforward project that can significantly improve the look and functionality of your furniture. By following the steps outlined above, you’ll find that upgrading your table is rewarding and surprisingly simple. Whether you’re looking to modernize your decor or breathe new life into a well-loved piece, metal table legs are a versatile solution that combines style and practicality. So, grab your tools and get ready to transform your furniture easily!


(0) comments
Welcome to the discussion.
Log In
Keep it Clean. Please avoid obscene, vulgar, lewd, racist or sexually-oriented language.
PLEASE TURN OFF YOUR CAPS LOCK.
Don't Threaten. Threats of harming another person will not be tolerated.
Be Truthful. Don't knowingly lie about anyone or anything.
Be Nice. No racism, sexism or any sort of -ism that is degrading to another person.
Be Proactive. Use the 'Report' link on each comment to let us know of abusive posts.
Share with Us. We'd love to hear eyewitness accounts, the history behind an article.